This website uses cookies. If you continue to use the website, we will assume your consent.OKPrivacy Policy / Read more Setup Professional Voicemail Greetings on iPhone With Examples: Personal, Business and Busy
a voicemail message was left
The last few years have seen a huge rise in the use of automated voicemails and auto-attendant greetings. This has been especially true for the business sector, where professionals should record friendly and polite voicemails to greet their customer callers.
Services > Unite > Auto Attendant > click on the name of the Auto Attendant > click on three dots next to the name of the menu > Disable or Delete.
.
what are some voicemail greetings
21. Hello, you’ve reached the Sales Department at [X company]. We can’t take your call right now, but please leave your name, contact information, and the reason for reaching out, and one of our team members will be in touch within 24 hours.
4. Emergency Services or Medical Office Script. Thank you for calling [Company Name]. If this is a medical emergency, please hang up and dial 911.
voicemail message text
A voicemail greeting can be pivotal in attracting a potential customer to your company or repelling him! So, it may be worthwhile to utilize some tried and tested tips to frame voicemail greetings for your company. The first line must include a brief description of your company and the services it offers clearly. Tell the callers the time frame within which they will get a call from your end. Ensure the voice used in recording the greeting is cheerful and not drab one. Ensure the greeting is recorded not in a hurried manner so that the callers can understand each word without issues. Try keeping the voicemail message length to 20 seconds or so.
In Microsoft 365, you can record a greeting, edit call answering rules, set up Outlook Voice Access, edit text message and email notification settings, and turn on voice mail preview using Outlook on the web. To access voice mail settings in the new Outlook on the web, select Settings > View all Outlook settings > General > Voice mail.
voicemail greetings work
After the “message before answering”, the waiting announcement is immediately cut. Hold messages scripts are very powerful for you to keep your callers interested and reduce the tendency of drop calls. Here are some additional samples of hold messages scripts you can use for your business: General Business - On Hold Example
what is my comcast business voicemail access number
how to set up voicemail giffgaff
voicemail message personal examples
voicemail greetings professional script
voicemail message template office
greetings for business voicemail
free celebrity voicemail greetings
professional holiday voicemail greetings
voicemail greetings ideas
how to access comcast business voicemail
voicemail greetings for schools
funny vacation voicemail greetings
what to say in your business voicemail
2.) Benvenuti alla John Doe. Purtroppo ci state chiamando fuori dal nostro normale orario di lavoro. Ci potete contattare personalmente dal Lunedì al Venerdì dalle 8am alle 6pm e il Sabato dalle 9am alle 4pm. Si prega di lasciare un messaggio o di inviare una e-mail a: [email protected]. Vi contatteremo al più presto possibile – Grazie.
great business voicemail messages
Interesting Read : Interactive Voice Response: What Is It And How Is It Beneficial?
If you’re an entrepreneur or small business owner who’s debating the benefits of getting a voicemail greeting, keep reading!
I’ve got you covered. I’ve compiled some of the best voicemail greetings you can use for virtually any situation you’ll come across.
how to set up a business voicemail
These are just a few ideas to get the gears turning. These are simple examples, but don’t be afraid to show a little personality.
Below are instructions to setting up the Unity system on your Cisco telephone. Once you have completed the setup process your voicemail box will be ready to receive messages. There are three ways to accessing and setting up your voicemail: From your Cisco telephone From any campus telephone From an off campus telephone Other Functions: Self Service Password Reset Support Self Service Cisco Passcode Reset Visit: https://voicemail.pepperdine.edu/ciscopca/home.do Enter the following information:
Support Centre My Account Portal How To Complex PBX Setup Example, IVR with After Hours
small business voicemail service
Even better, all these voicemail greetings are free and you can download the voicemail’s mp3 file! Business voicemail greeting samples. If you have a main business phone number that’s shared with the customers or publicly listed, you’ll want to make sure it has a professional voicemail message to greet callers.
01Hello this is [your name], I’m either on another call or away from my desk. Please leave your details, along with a short message and I’ll get back to you. This is created by individual staff for their specific number or extensions. It’s a great voicemail greeting for work when you are on another line or away from your desk.
Link to an existing menu provides the way to associate the menu with an existing menu. Linked menus are mirror images and menu changes reflect in both places. This type of menu is created with the same greeting as the source menu. The difference from the pre-populated is that the modifications made to any of the linked menus will update both menus.
voicemail message greeting for work
0333 990 0009 [email protected] Follow Us Twitter Instagram Facebook YouTube LinkedIn Onhold Studio Connect Ltd
Record a personalized greeting, up to 3 minutes long. A common template you can follow is: "You've reached [name]. We can't get to the phone right now, but if you leave a message, we'll call you back."
The reason being it can either push your prospects away from you or retain them for longer.
Be Part Of Our Story!
business telephone voicemail message
We’re all familiar with this type of voicemail greeting. Simply put, a caller reaches you by dialing your number or extension directly. For an optimal personal voicemail greeting, be clear about who you are, the team you’re on, and when the caller can expect a callback. Unlike company and department voicemail greetings, you may not be able to configure a greeting for open and closed business hours. If that’s the case, use a general voicemail greeting that accommodates both scenarios.
what should i say on my business voicemail
Keep those communications personal – we don't want our clients to think that we are robots!
funny rude voicemail greetings
Once this has been set, select the Destination drop down for your open event, then select Queues and New Queue
Contact Us
While they are listening to your voice, they are internally deciding whether or not it is worth their time to continue or hang up. Look at your voicemail message as its own short advertisement.
what message to leave on business voicemail
The professional voicemail greetings is the cornerstone of any good business. Not every voicemail recording is relevant to every situation. This guide is going to demonstrate some of the specific custom voicemail greeting examples for doctors, dentist, real estate agent, lawyers and other professionals.
If you can't set up Visual Voicemail, contact your carrier to make sure that your plan supports the feature.
"Thank you for calling Onhold Studio. Sorry our office is currently closed. Regular opening hours are 9am to 5pm, Monday to Friday. Please leave a message along with your name and phone number after the tone and we'll respond to your enquiry on our next working day."
Here, the ophthalmologist is not in a position to receive a call. However, he/she makes sure the patient’s need is addressed.
47. Howdy, right here’s [name], [company]’s [job title]. I’m cheerful to aid you with [task], but I’m at this time away from my phone. Flow away a hasty message and I’ll return your name as rapidly as I will. Thanks!
1. HI, you’ve reached (name). I’m so sorry I can’t pick up the call right now because I am standing right behind you. GOTCHA.
!
voicemail greetings examples for offices
voicemail greetings with extensions
work voicemail message sample
comcast business voicemail change greeting
866-925-8312 Send a Message View Cart Sign In Search 866-925-8312 913-599-2583 Send a Message View Cart My Account Search 866-925-8312 Send a Message View Cart Sign In Search
While straightforward is always the safe bet, certain entities can go to the humorous side of voicemail greetings. Before taking this route, consider the type of callers and the persona the recipient is trying to convey. Since (insert name) isn’t available at the moment to take your call, but will promptly return it should you decide to accept your mission and leave your name and number, we have a very important question to occupy you in the meantime. Why did the chicken cross the road? Voicemail Greetings For Vacation
Photo in the article by “International SAP & Web Consulting” https://www.ybierling.com/st/blog-various-how-to-change-default-messaging-app Related posts: Question: How To Set Voicemail On Android? How Do I Set Up Voicemail On My Android Phone? Quick Answer: How To Check Voicemail Android? Quick Answer: How To Change Voicemail Android? How To Change Voicemail Password On Android? Quick Answer: How To Set Up Voicemail On Android? Note: Android text messages are stored in SQLite database folder which you can only Use the system setting (Settings -> Display -> Theme) to enable Dark theme. Use
Voicemail greetings (like voice messages) are best when they are brief and to the point. Practice your new greeting so that your enunciation and information are clear, saving your caller from making a second call to clarify your message.
Hi! This is (name) in (office or department name) at Eastern Oregon University. I am currently working remotely in response to the coronavirus outbreak, and may not be able to check missed calls regularly. Please contact me at (employee email) or leave a voice message. In case of an emergency please contact Campus Security at 541-962-3911. Thank you.
35. Hello, we’re wishing you all a happy [X holiday]. Our office is currently closed so our employees can celebrate with their loved ones. Please leave your name, number, and reason for calling and a member of our team will return your call when we reopen on [X date].
voicemail message for realtors
how to set up voicemail on nec phone
example of voicemail message out of office
comcast business voicemail change greeting
4. Voicemail greetings for calls received after business hours. You don’t want to answer calls 24/7 (unless you’re serving clients globally and there’s an expectation of 24/7 support).
voicemail message via phone co
What kind of company do you run? A law firm may prefer more formal business voicemail greetings than a trendy retail store, for example.
This greeting is heard by a caller once they are forwarded to a voice mailbox. Press the up or down navigation buttons to select Play or Re-Record and then press Enter. Press Enter to stop playback or recording.
Website: https://futureofworking.com/11-office-closed-due-to-inclement-weather-messages/
In the New Sound Event popup, set a name for your sound (eg. AH Prompt), then in Sound, you can either select an existing audio file on your PBX, choose a file from your computer (New Sound (Upload)), or use your phone handset to record a sound file (New Sound (Record)). For this example, we would record a message along the lines of "You have reached our after-hours support line. Please wait while we connect you to an on call support agent".
37. Howdy, right here’s [company name]. Sorry we omitted your name. Flow away a message and we’ll receive aid to you rapidly.
free female voicemail greetings mp3
voicemail message company
professional pre-recorded voicemail greetings
best business voicemail messages
4. Product-Focused. Thanks for calling [Company Name].For more information about our products, press 1. If you have troubleshooting questions, press 2. For billing questions, press 3.
We actually know a top insurance sales guy who did a sales motivational message every day just like this, and people used to call just to listen to his thoughts.
Call 800-244-1111, and a representative will verify your identity and reset your PIN for you.
50. Hi, this is the customer service center at [X company]. We’re sorry to have missed your call. Leave your name and number and the next available representative will call you back to assist you. Things to Include in a Voicemail Message Get the Caller to Leave Their Name and Phone Number
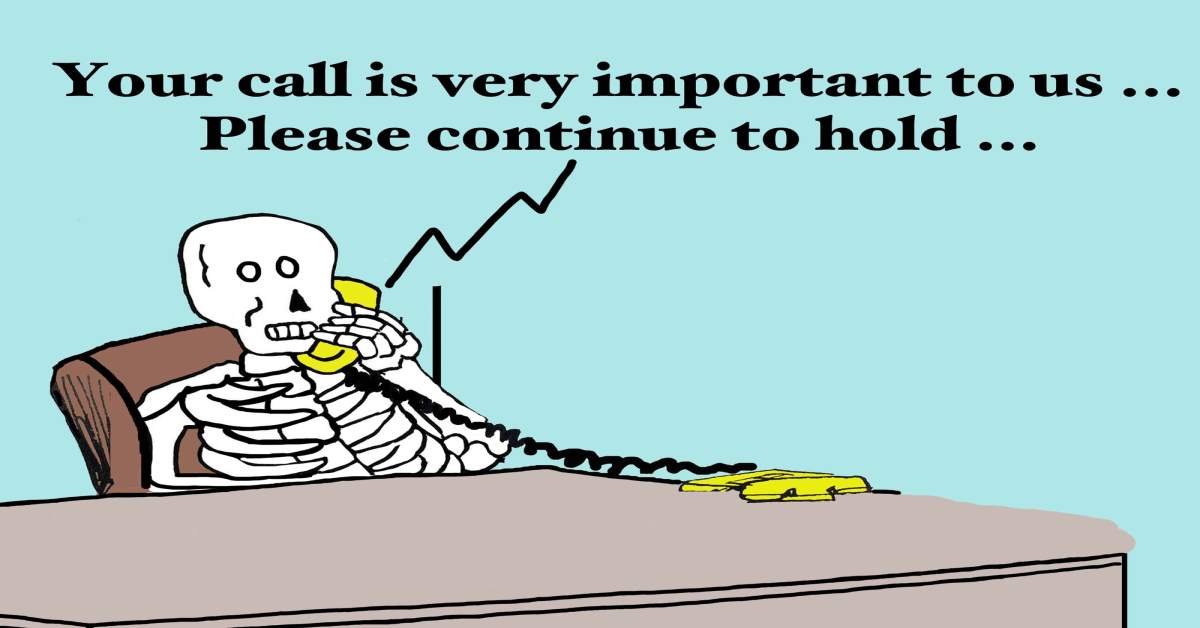
Your message is a period of time that they are forced to wait through in order to do what they called to do in the first place — relay information to you.
2.) Benvenuti alla John Doe. Purtroppo ci state chiamando fuori dal nostro normale orario di lavoro. Ci potete contattare personalmente dal Lunedì al Venerdì dalle 8am alle 6pm e il Sabato dalle 9am alle 4pm. Si prega di lasciare un messaggio o di inviare una e-mail a: [email protected]. Vi contatteremo al più presto possibile – Grazie.
Website: https://ciptavisual.com/18-funny-out-of-office-messages-to-inspire-your-own-templates/ Filter Type All Time Past 24 Hours Past Week Past month Contact List Found1. (617) 527-3023 2. 800-555-1212 Brand Listing› Hr Block› Adobe Premiere Pro› Shopkins› Used 1995 Jeep Wrangler For Sale Near Me› Aaa› Yahoo› Linux› Code Talker› Wetsuit› 3d Printing› Bni› Iphone› Light Meter› Medicare› Crafting And Building› Texas InstrumentsBrowse All Brands >> Frequently Asked QuestionsWhat is a good voicemail greeting?
41. Howdy, you’ve reached [X company]. Flow away a message so we can name you aid as rapidly as our team has a spare second.
5. “Hi, you’ve reached [company name]. We can’t take your call right now but we will call you back as soon as we’re available. Please leave your name, number and reason for your call. We know your time is precious, so to skip the back and forth, kindly leave a few different times of day that work best with your schedule and we will do our best to reach you then! Have a great day.” This greeting lets your caller know that not only your time is precious, but you realize theirs is as well.
We use cookies to personalize content and ads, to provide social media features and to analyze our traffic. We also share information about your use of our site with our social media, advertising and analytics partners. Social Facebook Twitter You are here: Home » Blog »Counseling » Voicemail Greetings
Create a general after-hours auto reply for customer messages that arrive in your main shared inbox. Depending on your SMS brand voice guide, this response can mimic a standard email response or sound a little more casual: Hello, you have reached Keller & Strachan Law Firm. Our hours of operation are Monday to Friday, from 9am to 5pm PST.
how do i set up my voicemail on my phone
business voicemail script sample
voicemail message not downloaded
rogers small business voicemail
When recording your business voicemail greetings on your VoIP phone system, make sure to state the correct time when your callers can expect you to call back. If your call-back policy is within two hours or 24 hours, make sure to say the correct expected time so your callers don’t waste their time waiting for your call.
Call routing override redirects all calls coming to the Auto Attendant flow. To enable this feature, navigate to Unite > Auto Attendant > List of Auto Attendants > Call routing override option > Number/extension. Company voicemail, Auto Attendant voicemail, Hunt Group voicemail, User voicemail, Voicemail Box Resource,
This website uses cookies to improve your experience while you navigate through the website. Out of these, the cookies that are categorized as necessary are stored on your browser as they are essential for the working of basic functionalities of the website. We also use third-party cookies that help us analyze and understand how you use this website. These cookies will be stored in your browser only with your consent. You also have the option to opt-out of these cookies. But opting out of some of these cookies may affect your browsing experience. Necessary cookies are absolutely essential for the website to function properly. This category only includes cookies that ensures basic functionalities and security features of the website. These cookies do not store any personal information. Non-necessary Any cookies that may not be particularly necessary for the website to function and is used specifically to collect user personal data via analytics, ads, other embedded contents are termed as non-necessary cookies. It is mandatory to procure user consent prior to running these cookies on your website.
Create a general after-hours auto reply for customer messages that arrive in your main shared inbox. Depending on your SMS brand voice guide, this response can mimic a standard email response or sound a little more casual: Hello, you have reached Keller & Strachan Law Firm. Our hours of operation are Monday to Friday, from 9am to 5pm PST.
You have stated your calls-to-action. Now you have to make sure they know the process to follow. If you want your customers to leave their voicemail messages, you have to tell them from the start, “Kindly leave your name, purpose of your call, and how to contact you.”
7. Direct Customers to Your Account Login Page. Thank you for calling [Company Name]. Our offices are currently closed for the day. Standard office hours are Monday to Friday, 8 AM to 8 PM Eastern Time.