Yeastar S-Series VoIP PBX integrates a free voicemail system. Voicemail is a modern kind of answering machine that allows the callers to leave audio messages in case of unavailability.
how to change your voicemail greeting on iphone 8
Change by aids of New voice mailbox greeting. Tips for verifying Voicemail on S10. Learn the information given below, find out the easiest ways of how to set up voicemail on a Samsung S10 phone, and verify msg. 1st way: check mail via visual voicemail soft. Choose incoming messages on S10; Go to the menu on the top of the screen
Each carrier has a different method for setting up voicemail, and we’ve provided a brief description of how to do it (and where to find instructions) where applicable below.
.
how do i change my voicemail greeting on iphone 12
To record greeting, it is mandatory to have a strong internet connection. Alongside, even if the network connection is perfect, then switch to Wi-Fi to Cellular data or vice versa.
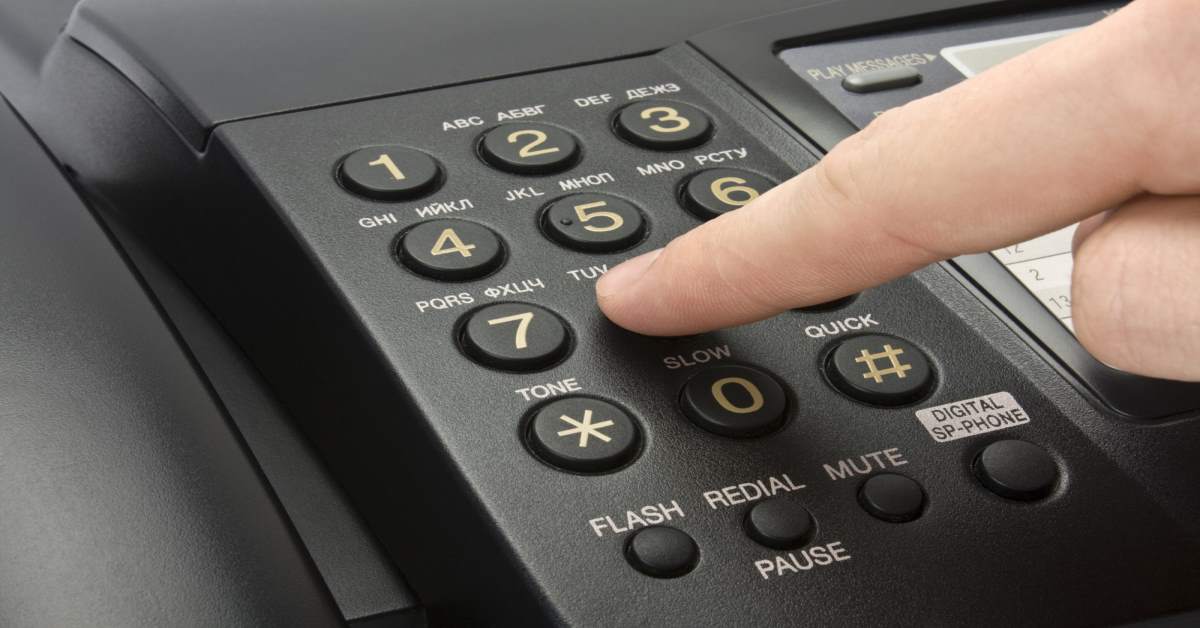
From a Home screen, tap the Phone app . Tap Voicemail .Tap the desired message then tap the Trashcan icon . Tap Deleted Messages.Tap Clear All (upper-right) then from the prompt.Tap Clear All to confirm. Select the Voicemail tab. Note: Alternatively, from the phone app, select the Keypad tab > select and hold the 1 key > if prompted, enter your voicemail password > follow the prompts to listen to your messages. Select the Voicemail tab, then select Set Up Now. Note: Alternatively, you can set up voicemail by selecting the Phone app then pressing and holding the 1 key. If prompted, enter your voicemail password, then follow the prompts to set up your voicemail.
change voicemail greeting on droid turbo
An extended absence greeting lets you record an alternate greeting without deleting your standard or personal greeting. It can be used as an after-hours message or for special instructions. To add an Extended Absence Greeting, first dial into the voicemail system. Either: From your mobile device, dial 1 + your 10-digit cellular number + CALL Or
Check your voicemail on iPhone. In the Phone app , Visual Voicemail (available from select carriers) shows a list of your messages. You can choose which ones to play and delete without listening to all of them. A badge on the Voicemail icon indicates the number of unheard messages.
how do i change my voicemail greeting on verizon
Conference Panel App allows you to establish a multiparty call, monitor and manage the conference call on web pages. QueueMetrics Integration App provides the interface to connect Yeastar S-Series VoIP PBX and QueueMetrics. Hotel App provides hotel management with the Yeastar S-Series VoIP PBX.
how do i change my voicemail greeting on iphone 5
how to change your voicemail message from different phone
professional voicemail greeting uk
how do i change my voicemail message on a cisco ip phone 7942
how to change your voicemail greeting on a android
can you change my voicemail greeting
how to change your voicemail message koodo
change voicemail greeting iphone 6
how to change voicemail greeting iphone 8
how do you change your voicemail greeting on iphone 6
how do i change my voicemail message on a nortel networks phone
how to change my voicemail message on my verizon phone
how do i change my voicemail message remotely
8. Disable Wi-Fi on your iPhone. Some people found success in fixing their voicemail woes when they temporarily disabled. Wi-Fi on their iPhone. Give it a go yourself.
professional voicemail greeting in spanish
5 - Navigate to Config > Mailboxes and edit your mailbox using the pencil icon to the right of your mailbox.
1. Open your Android’s Phone app. It usually looks like a phone receiver at the bottom of the home screen.
That’s it. You have deleted the old Voicemail greeting on your Android device and stored the new one. Congratulations!
how do i change my voicemail message on verizon landline
To access voicemail from another line, call the phone number, let it ring till it goes to VM, then interrupt the greeting by pressing * and entering the PIN. You can also call 8056377243 > press * > enter 10 digit phone number > enter PIN to access your voicemail.
Here are several tips to consider when setting up a professional voicemail greeting: Keep it brief and concise. Give options to get more details. Ask for detailed messages. Be enthusiastic and identify yourself and the company name. Use positive sentences. Take messages accurately and completely. How do I change my voicemail greeting? On your Android device, open the Google Voice app . At the top left, tap Menu Settings. In the Voicemail section, tap Voicemail greeting. Next to the greeting that you would like to use, tap more Set as active. How do I delete my voicemail greeting?
There are three ways to access your voicemail using your phone's dial pad. You can: Press and hold 1. Dial *86. Dial your Xfinity Mobile phone number. NOTE: If it's your first time calling into voicemail, follow the recorded instructions to create a voicemail PIN. You’ll then record your name and set up a greeting.
how do i change my voicemail greeting on motorola
Turn your phone off for 10 seconds and then back on. Place a test call to 611. Do one of the following: If the test call is successful, press and hold 1 to dial into the voicemail system. If your test call fails, confirm you have wireless coverage. If Visual Voicemail won't download, press and hold 1 to check your messages.
Send a message. Call into your voicemail. Press 2 to send a message. Enter the mailbox or distribution list number you want the message to go to. Record your message. If you want to schedule the message you just recorded to go out later: Press 4 for delivery options. Press 4 for future delivery. To deliver it today press #. To deliver it on a
4. By default, your voicemail will be setup with your carrier's generic greeting.
can you change your voicemail greeting
Dial your home phone number. When the voice mail greeting starts, press the ‘*’ key. Enter your voice mail password and press the ‘#’ key. Press ‘1’ to review new messages. Press ‘2’ to record a new message. Press ‘3’ to review other messages. Press ‘4’ to change personal options. How do I set the number of rings until a
“Hello! You’ve reached the voicemail of [your name], [your job title]. I’m currently either away from my desk or on the other line. Please leave your name, telephone number, and a short message after the beep, and I’ll be sure to get back to you as soon as I’m available.” Press and hold the 1 key to access the voicemail system. When you hear the recorded message, press the # key to bring you to the system menu. Press 4, for the Personal Options followed by 2 for Personal Greeting. Follow the prompts to record, listen to, re-record and save your greeting. How do I change my voicemail number on Samsung Galaxy s8? Find “Voicemail number” Press Phone. Press the menu icon. Press Settings. Press Voicemail settings. Press Voicemail number. Save voicemail number. Key in +61414121121 and press OK. +61414121121. Return to the home screen. Press the Home key to return to the home screen. Dial voicemail: Press and then hold on the envelope icon displayed on the main screen. Enter Your Accounts Password: Enter the password if prompted. Delete voicemail: Tap 7 on any voicemail and it will be deleted successfully. Open the dial pad on the device. Open the application drawer and scroll through to find the Phone app. Dial Voicemail. Tapping the number 1 and then hitting the green phone icon at the bottom should call Voicemail. Enter a password (if there is one). Skip through messages. Delete a voicemail. Log into Google Voice. Click on the gear icon. Select “Settings” from the menu options. Click the “Voicemail & Text” button. Click “Record New Greeting” in the Voicemail Greeting section. Enter the name for the greeting you are going to record. Select forwarding phones. Click “Connect.”
When I go to the voicemail icon and click it it automically calls voicemail. I have no other options available.
The telephone systems have the feature named as Voicemail. VoIP is the best example of it. When a receiver is unable to pick up the phone, then the caller can leave the voice message on the receiver’s phone. In older telephonic machines, such messages were stored as a voice message directly, and the receiver can hear them later. In modern telephone systems, such info is being stored on the server of the service provider in the user’s mailbox. It is similar to email in which the messages are saved in the form of audio instead of text.
how to change voicemail greeting on iphone 6 plus
Repeat steps 2-3 to check your voicemail. Feel free to send us your questions, suggestions and problems you’ve encountered while using your Android phone. We support every Android device that is
Contact Us
To change your voicemail message on iPhone: 1. On your home screen, tap Phone. 2. At the bottom, tap Voicemail on the menu bar. 3. Tap Greeting in the top left corner of your screen. 4. Tap Custom if you want to record a custom greeting. 5. To record a new greeting, tap Record. Tap Play to listen to it. 6. Lastly, tap Save in the top right corner.
professional voicemail greeting examples
How do I find out my Iphone voicemail password? Change your voicemail password: Go to Settings > Phone > Change Voicemail Password, then enter the new password. If you forgot your voicemail password, contact your wireless carrier. Change the alert for new voicemail: Go to Settings > Sounds & Haptics or Settings > Sounds.
3 - Navigate to Config > Mailboxes and edit your mailbox using the pencil icon to the right of your mailbox.
Visual Voicemail won't let me play back or adjust greeting. I have a new iPhone SE running iOS 9.3.1, restored from a backup of my old iPhone 4S. Also I have changed carriers upon getting the new phone to Cricket from AT&T. When I set up the new iPhone, it installed carrier updates from iTunes and the Phone app let me set up my visual voicemail
Go to menu, and click on messages. At the bottom of the screen, it should say options. Click on options. You should see a list of options come up on the screen. Click on the one that says voicemail. When you click on voicemail, it should call the automated voicemail. You should hear an automated voice giving you options. When you hear personal options, press the number that the automated voice said was for personal options. The automated voice should then list some personal options. When you hear `greetings,` press the number that the automated voice said was for greetings. The automated voice should list some greetings. When you hear `personal greetings,` press the number that the voice said was for personal greetings. Follow the automated directions from there.
So far you probably had a generic voicemail greeting on your iPhone and want to change it to a personal voicemail greeting and with most carriers you don’t even need an additional voicemail recording app and can record a custom voicemail greeting directly on iPhone.
Sep. 28—TUPELO — The Lee County School District reported 24 COVID-19 cases among students and 54 student quarantines during the eighth week of school. That's about .9% of the district's approximately 6,000 students who were quarantined during the eighth week, down from about 1.3% the previous week. The Tupelo Public School District had quarantined around 2.4% of its approximately 7,000 ...
!
professional voicemail greeting for job seekers
can't change voicemail greeting on iphone xr
how do i change my voicemail message on a nortel networks phone
how to change voicemail greeting on iphone 11 pro max
Note 2: If you are not sure of your voicemail password contact your Allworx vendor and they should be able to help . OR. From a specific phone. Hit the messages button (located below the display in the middle of the phone) Enter your password plus # Press 4 (to Change settings) Press 4 (to manage your greetings) Press 3
Open the dial pad on your mobile phone. You can see the Voicemail hot button (in most cases, it is the number ‘1’ on the dial pad). Press & hold that button, and it will take you to the Voicemail directly. You can also go to the Voicemail from the phone menu.
Website: https://howfinity.com/video/how-to-record-or-change-voicemail-greeting-on-iphone-927
Tap “Phone” on your iPhone’s “Home” screen and tap “Voicemail” to access your voice-mail settings. Tap “Greeting” and select “Default” if you wish to use the default greeting for your voice mails. Click “Custom” if you want to create a personalized greeting, and tap “Record” to say your greeting.
Visual voicemail messages and non-visual voicemail messages are not stored on the SIM card. They should be stored on your carrier’s servers, so contact your carrier. On your Android device, open the Google Voice app . At the top left, tap Menu. Settings. Under Voicemail, turn on the type of forwarding that you want: Get voicemail via message – Tap, and then next to your linked number, tick the box. Does a voicemail automatically send?
Website: https://www.bemidjistate.edu/offices/its/knowledge-base/how-to-change-your-voice-mail-greeting-on-your-mitel-phone/
How do you check your VoiceMail? To check your voicemail messages from another phone: Call your 10-digit wireless number. When you hear your voicemail greeting, press the * key to interrupt it. If you reach the main voicemail system greeting, enter your 10-digit wireless phone number, then interrupt your greeting by pressing the * key.
For personal users, a funny iPhone voicemail message may be just what you want. It’s still a good idea to keep it short, but you can have some fun by using your iPhone to record a funny voicemail message played over a speaker on your computer or another device.
If you haven’t set up any voicemail on your android, you can follow this step by step tutorial:
Here are step-by-step instructions: Open the Phone app. Press and Hold number 1 to call your voicemail service. You will be asked for a PIN if your voicemail is already set up. You can reset it …
1. Press the fixed key with the envelope graphic, or dial the phone’s phone number.
how to change your voicemail message telstra
most professional voicemail greeting
how do i change my voicemail message on norstar
why can't i change my voicemail greeting
How to change your Google Voice greeting using a computer. 1. Go to the Google Voice site on your Mac or PC and sign into your account. 2. Click …
You can either press and hold 1 key or dial 805-637-7243 to access your voicemail.
No you can’t. I just called and asked for it to be turned off completely and was told it is impossible. It’s aggravating to get conflicting information. Obviously either the CS Team member who wrote the previous post, or the employee I just spoke to on the phone, doesn’t know what they’re talking about.
Join one of our twice weekly webinars for a guided tour of our business phone system and features. Business VoIP Number Transfer number to VoIP Cloud PBX Phone System PAYG VoIP Call Costs VoIP Phone Systems VoIP Phone Numbers Business Phone System Hosted VoIP Plans VoIP Trial Account Business VoIP SIP Trunks SIP Provider SIP Trunk Features SIP Trunking VoIP Reseller Domain Reseller White Label VoIP Reseller Domain Name Search Domain Transfer Backorder Domains Domain Name Registration Domain Name Features Help & Contact Contact Us Frequently Asked Questions Download Yay.com Apps Advantages of VoIP What is VoIP? VoIP Beginner's Guide VoIP API Documentation Domain API Documentation Login / Register About Yay Our News Our Blogs Terms & Conditions Privacy Policy Accreditations About Yay! Terms & Conditions Privacy Policy How to change your Google Voice greeting using a computer. 1. Go to the Google Voice site on your Mac or PC and sign into your account. 2. Click …
The tutorial performed below was done on an iPhone 5 that is using the iOS 7 version of the operating system. Your screens may look different if you are using a different version.
can't change voicemail greeting
how to change your voicemail greeting on iphone xr
how to change voicemail greeting on iphone 6
create professional voicemail greeting
4. Reset your pin. Maybe you have forgotten your pin or passcode or you never set it up in the first place. This is a common issue. Most carriers have detailed instructions for changing passcodes. For example, to change a T-Mobile passcode, hold down the "1" key, then press the star key, and then press number 5 to go into passcode security. Then press 1, and you will be able to change your passcode. You can change your Sprint passcode online by choosing the my preferences tab and then the "things I can manage online" section. You can reset your pin by calling the carrier if you have forgotten it or never set it up at all. Some sites allow you to do this online.
5. Switch on and switch off Airplane Mode. You can do this from either Settings or the Control Center. On iPhone X or later, swipe down from the top right of the screen (where the battery indicator is).
You can disable voicemail by dialing ##002# on your phone. That disables all call forwarding so no calls will go to voicemail. I use Google Voice for voicemail so I disabled it on the cellphone side.
Website: https://support.spectrumvoip.com/hc/en-us/articles/360024048493-How-do-I-change-my-voicemail-greeting
Sometimes, giving your iPhone a fresh start by turning it off and back on again can resolve a minor software issue. For instance, if the software of your iPhone crashed in the background, it may have caused the Phone app to malfunction.
source: How do i change my greeting for my voicemail messages on my assurance wireless cell phone? ahammad1996 Level 1 (Contributor)
how to change voicemail greeting on iphone 6 plus
how do i change my voicemail message on tesco mobile
how do i change my voicemail greeting on my samsung s6
generic professional voicemail greeting
Step 1 – Set your PIN – this protects your mailbox from eavesdroppers. Log on to your mailbox. Dial 6 7 for mailbox options. Dial 7 for security code. The phone system will guide you through replacing your 4-digit security code. Step 2 – Record your name. Callers may hear your recorded name before leaving you a message.
Choose a greeting—Default or Custom; if you choose Custom, you can record a new greeting.
4. Before each voicemail message is played, enter the number associated with deleting a message.
I can access my voicemail from my phone just fine. I’m just cheap and used Hangout/Google Voice to save my minutes.
1. From the Home screen, tap the Phone Key in the Quick Keys bar. (The Phone application can also be accessed from the Applications screen.)
Visual Voicemail won't let me play back or adjust greeting. I have a new iPhone SE running iOS 9.3.1, restored from a backup of my old iPhone 4S. Also I have changed carriers upon getting the new phone to Cricket from AT&T. When I set up the new iPhone, it installed carrier updates from iTunes and the Phone app let me set up my visual voicemail
apple iphone change voicemail greeting
how do i change my voicemail message on ringcentral
how do i change my voicemail message on my microsoft phone
Xprofessional voicemail greeting examples for cell phone