how do i change my voicemail message from another phone
My voicemail doesn’t tell me the number, date or time the caller made the call. Can it be set up to do these things?
rogers iphone change voicemail greeting
press and hold 1.if you’re calling from another phone, dial: 07953 222 222 (UK) or +44 7953 222 222 (abroad)you’ll need to have set up and be ready to enter your voicemail PIN to listen to your voicemail messages from another phone. Share this example Share on facebook Share on twitter
Website: https://homedecore1122.blogspot.com/2021/09/how-to-change-voicemail-on-iphone-12-pro.html
.
how do i change my voicemail message on my sony xperia
Website: https://www.att.com/support/smallbusiness/article/smb-wireless/KM1009187/
When it comes to making phone calls, nothing can leave one more in the dark than leaving a message on a voice mailbox that hasn’t been set up yet. However, if you happen to be in the dark in regards to setting up your voicemail, we’re going to walk you through the process to avoid confusion on your end. With this being said, here’s a look at how to set up your iPhone voicemail.
how to change my voicemail message vodafone
Besides, to update Carrier settings, go to Settings > General > About. If any carrier update is available, the pop-up will ask you to update it.
Website: https://www.centurylink.com/home/help/home-phone/calling-features/how-to-set-up-your-centurylink-voice-mail.html
change voicemail greeting iphone 10
Play, download, or delete voicemail messages. Sign in to the Zoom app. Tap the Phone tab .; Tap the Voicemail tab. Voicemail messages are displayed in reverse chronological order with most recent messages at the top. You can identify voicemail messages using the following: If the number has a caller ID name or belongs to internal or phone contacts, you'll see a name above the number.
how to change your voicemail message from different phone
ideas for professional voicemail greeting
rogers iphone change voicemail greeting
how to change voicemail greeting iphone 8
how to change voicemail greeting on iphone xr
how to change your voicemail greeting on iphone 6
how do i change my voicemail greeting on iphone 11
how to change your voicemail greeting on iphone 6 plus
change voicemail greeting on skype
buy professional voicemail greeting
how do i change my voicemail greeting in skype for business
how do i change my voicemail greeting on iphone xr
We are not offering visual voicemail feature at the moment. Its on our development road-map and will be available in the future.
9. Make sure Call Forwarding is off. If you have a call forwarding set up, it is likely to cause conflicts with voicemail. To turn off Call Forwarding or make sure it is not enabled
In sworn testimony before the Senate Armed Services Committee, top generals said Tuesday that they recommended keeping around 2,500 U.S. troops on the ground in Afghanistan.
how to change voicemail greeting on iphone 10
3 - Navigate to Config > Mailboxes and edit your mailbox using the pencil icon to the right of your mailbox.
Change the message as often as you like. To add a status message. Click your photo, click Click to add status message, and then type a message, such as “In training today” or “Working on a deadline, please IM instead of stopping by.”. If it’s your first time setting up voicemail, you’ll likely see a message that says “No voicemail
4 hours agoTo change or record your voicemail greeting: From your: Wireless phone: Press and hold 1 or the Voicemail key. AT&T Wireless Home Phone: Dial 1 from your connected home phone. Enter your voicemail password if prompted. In the Main Menu, press 4 for Personal Options. Press 3 to Change Greetings. Follow the voice prompts to record a personal
good professional voicemail greeting
This was extremely helpful followed your instructions and worked like a charm, on IOS 9. Sep 21, 2015 8:33 AM Reply Helpful Reply Helpful (11) Reply Helpful (5) User profile for user: tar722 tar722 (13 points) Nov 3, 2015 8:28 PM in response to AmishCake In response to AmishCake Nov 3, 2015 8:28 PM User profile for user: jkmont71 jkmont71 Dec 3, 2015 6:13 AM in response to BattleshipCobra In response to BattleshipCobra
Call the voicemail system to change your password: From your AT&T wireless phone, press and hold 1. For AT&T Wireless Home Phone, dial 1. If prompted, enter your voicemail password. If you have new messages, press the * key to skip to the Main Menu. In the Main Menu, press 4 for Personal Options. Press 2 for Administrative Options.
You will be asked to delete your current Voicemail greeting. Click on the ‘Yes’ button that appears on the screen if you want to remove that. You can save your new recorded Voicemail greeting or can use the default recorded option. Wait and hear the new Voicemail greeting message that the instructions speak out. If you want to keep that recording as your Voicemail greeting, then save it. Or you can re-record the message to get a different greeting.
professional voicemail greeting holiday
I’m glad visual voicemail is in the works. Can you provide a rough estimate as to how far into the future it may be? Thanks.
So, this is the first yet the most effective way of changing the voicemail settings from Spanish to English. In this case, you need to use the voice mail system and follow the below-mentioned steps; First of all, you need to dial the voice mail system by calling 888-234-6786 The new window will open up Enter the password Now, press 4 and it will open the personal options Press one again to open the personal profile Then, choose the change language option by pressing two Choose one and the English language will be set
For those who prefer not to use the Phone app, you can set up voicemail by selecting and holding the 1 button on your keyboard.
Be Part Of Our Story!
example of a professional voicemail greeting
Step 2. Press and hold “1” key on your keypad. You will get a message that you have no voicemail number stored on the card.
how to change my voicemail greeting on iphone
If you still remember the password of voicemail on iPhone, you can easily change the password of your voicemail on iPhone. When you forget the voicemail password, you should retrieve the information from the Email or call the carrier directly for a solution.
how to change voicemail greeting on an iphone
Now, it’s the time for a tutorial on how to change voicemail greeting on Android. Basically, there are two methods to get it done, depending on your system operation. If you’re using Android Marshmallow, here’s what you need to do:
Contact Us
It's in the upper right corner of the screen. Now, if you are prompted to type in your password when you are checking voicemail, you should enter the password you just set. When checking voicemail from your iPhone, usually you don't have to type in the password again because your iPhone has automatically sent the password to your carrier already.
Website: https://www.bemidjistate.edu/offices/its/knowledge-base/how-to-change-your-voice-mail-greeting-on-your-mitel-phone/
Firstly, with the advent of technology like Google’s new “Duplex” system, it’s going to reach ..
HomeSocial studiesWhen recording a personalized voicemail greeting on your office phone your greeting should? When recording a personalized voicemail greeting on your office phone your greeting should? When recording a personalized voicemail greeting on your office phone your greeting should?
2. Touch the Action Overflow icon and then choose the Settings command. On some phones you need to touch the Menu icon to access the Settings command.
When I go to voicemail it just disconnects me. I have tried dialing 1 and also the number 805-637-7243.
!
You can either press and hold 1 key or dial 805-637-7243 to access your voicemail.
If you`re not in one of the countries that support 171 / 172 , take the following steps to set up your greeting:
Press the Top button and the Home button at the same time. Quickly release both buttons. After you take a screenshot, a thumbnail temporarily appears in the lower-left corner of your screen.
Depending on which Android phone model you are using, you can dial the carrier code and directly stop the Voicemail service.
Website: https://ee.co.uk/help/help-new/getting-started-and-upgrading/using-your-phone-features/how-do-i-use-voicemail
how to change voicemail greeting iphone 7
how to change your voicemail message tesco mobile
how do i change my voicemail message on my huawei
how to change voicemail greeting in iphone 7
Having knowledge of how to set up voicemail on Android or iPhone can help you avoid missing essential calls in certain instances. This will allow you to be away from your other enterprises or engagements without having to worry about missing any critical calls.
how to change voicemail greeting in iphone 7
Metropcs recording new voice messageWhat is the difference between fit to content/ fill screen / actual size options when i choose the display options of the picture?Samsung galaxy... i was wondering how can i turn my screen lock options on with out rebooting my mobile. the only two options are pin and password ...Metro pc you tube how to set your own personal greetingBlackberry bold 9900 os is corrupt. cannot wipe via options the menu. bb desktop sw will not connect to the bb. are there any other options?When i right click on black screen i didn,t getting the settings options?Metro pc voicemail change greetingI do not see the options for enterprise activation anywhere in the advanced options menu?Hi. my blackberry rollerball will not `click` to access/select menu options etc? "Options and then you press three to change or listen to your previous greeting...."
Updates for Safari, FaceTime, and many other apps, Universal Control to let a single mouse or trackpad control multiple devices, new Shortcuts app, machine-learning Live Text detection and Visual Lookup, and more.
5 hours agoHow to record a custom Voicemail greeting on iPhone. Have you left the greeting settings to default?. Do you want to change that setting now? It is possible, let me show you how to record a custom greeting for Voicemail on iPhone. Open the Phone app on your iPhone. Select open the Voicemail option present in the bottom right corner of the screen.
Note: Your voicemail Personal IdentificationNumber (PIN) is similar to a password. Just like a passwordis required to receive email, your PIN must be entered eachtime you retrieve voicemail messages. Voicemail comeswith a default PIN which is the last 6-digits of youraccount number. How do you turn your voicemail off? Checking the voicemail settings and looking fora 'Turn Off' or 'Deactivate' option is a good firststep regardless of the type of phone you're using. If you find theright option, select it and the phone will turn off itsvoicemail function for you. What is the Voice app on Android?
Along with having my greeting screen frozen I was also not receiving any indication that a call was coming in...no ring, no vibrate, no visual indication on the phone at all. All calls were going directly to voicemail and the greeting was some funky message...maybe it was the default although custom was checkmarked. I also tried resetting, turning off WiFi, checking Do Not Disturb. Dec 3, 2015 6:13 AM Reply Helpful (2) User profile for user: susan from morro bay susan from morro bay Jan 6, 2016 3:57 PM in response to tar722 In response to tar722
what do you say when recording a professional voicemail greeting
how do i change my voicemail message on rogers home phone
professional voicemail greeting for vacation
can't change voicemail greeting on iphone 6s
3. Settings menu. To access your voicemail setting menu, press and hold the 1 key or dial 123 on your device dial pad. If this doesn't work, dial 1-805-637-7249, enter your 10 digit number and while the voicemail greeting is playing, press * (star key) and enter the password.
we are happy to help you, submit this Form, if your solution is not covered in this article.
To change your Standard Voicemail greeting follow the directions below. Enter your password and the press # key. From Shoretel Communicator (You will need to have access to your Shoretel phone to record the message) In the menu bar, click More, then Prefereces. Your phone will turn on and beep. Begin your message.
Android phones can access voicemail by holding down the 1 key on the dial pad until the phone dials your 10-digit phone number. You will automatically connect to your mailbox and be prompted to enter your temporary password; this password is the last 4 digits of your phone number followed by the # key. Start the Google Voice app. Tap the three horizontal lines at the top left of the screen (sometimes called a hamburger menu), and then tap “Settings.” In the Voicemail section, tap “Voicemail greeting.” Tap “Record a greeting.” How do I access my voicemail? To call your voicemail on an Android phone, simply open your phone’s dial pad and hold your finger down on the “1” key. You can also call your voicemail from a different phone by calling your own number and tapping the pound key. How do you check your voicemail?
Filter Type: All Time (49 Results) Past 24 Hours Past Week Past month Post Your Comments?
How to listen to voicemail on iPhone. When someone leaves a voice message, you will see a badge with a number next to the Voicemail tab in the Phone app. The number represents all unheard voicemail messages. Open the Phone app on your iPhone. Tap Voicemail in the bottom right corner of the screen. Tap a voicemail to open the playback options. Filter Type All Time Past 24 Hours Past Week Past month Contact List Found1. 805-637-7456 2. 805-637-7249 New Contact Listing› Buildertrend› Pocono Mountains› Hcl Technologies› Yellowpagescom› Cdiscount Marketplace› History Of The Iphone› Terrain Contact At› Tracfone Wireless› Pnc Financial Services› Pixel Art Color By Number› Humble Bundle› Sirius Satellite Radio› Pace Suburban Bus› Myday› Ojcommerce› Internal Revenue ServiceBrowse All Listing » Frequently Asked QuestionsHow do i change the voicemail message on my iphone?
professional voicemail greeting service
how do i change my voicemail message on my panasonic kx t7633
how to change voicemail greeting on ringcentral
how to change voicemail greeting iphone 8
SwitchArcade Round-Up: Reviews Featuring ‘Cruis’n Blast’ and ‘Rift Adventure’, Plus the Latest Releases and Sales
For those who prefer not to use the Phone app, you can set up voicemail by selecting and holding the 1 button on your keyboard.
Website: https://community.cisco.com/t5/ip-telephony-and-phones/how-to-reset-the-voicemail-amp-greetings-password-for-7965-ip/td-p/3872297
Iphone wont let me change voicemail greeting Home Iphone wont let me change voicemail greeting
9. Verizon Visual Voicemail. This application has a minimalistic design and strictly defined functionality. When using Verizon Visual Voicemail, you get only voice mail and nothing extra.
One of the best and quick fix to this issue is to turn off Wi-Fi for once and switch to Cellular data connection and then try to change the default greeting to custom on iPhone.
change voicemail greeting in skype for business
how to change my voicemail greeting on an iphone
how do i change my voicemail message on my centurylink home phone
can't change voicemail greeting on iphone 6s
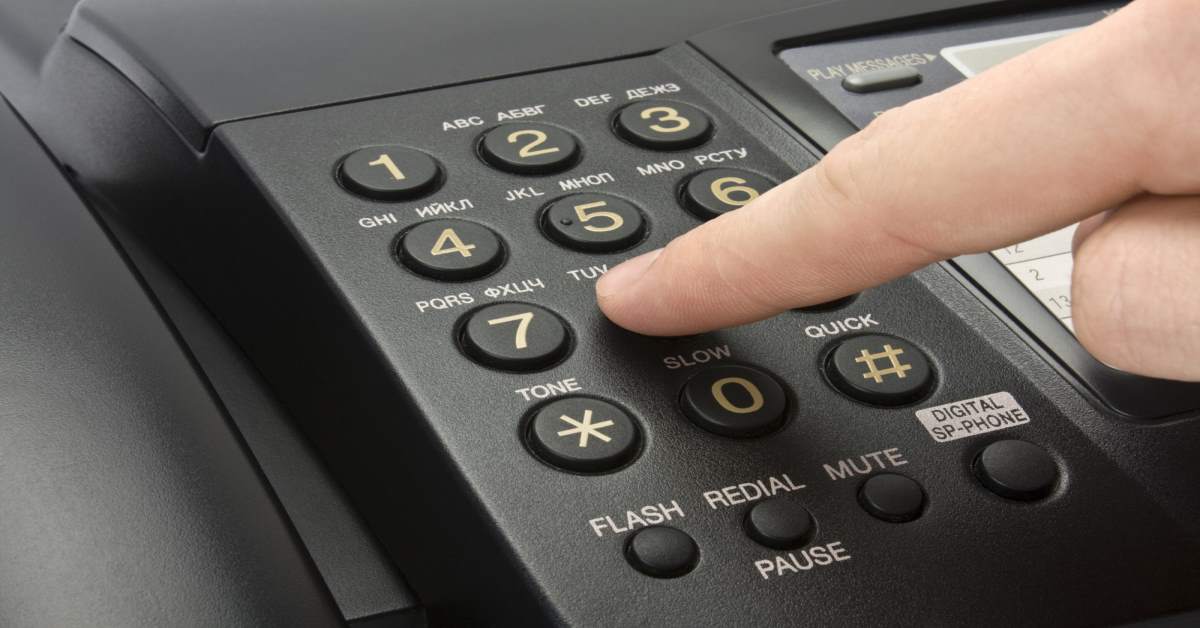
Access to voicemail can also be obtained through the iPhone’s dial pad by pressing and holding down the 1 key until your phone calls your 10-digit phone number, or by pressing the voicemail icon, which can be found in the bottom right corner of the dial pad screen, as shown in the image below.
See the overview for more information on these greetings/messages. Call Handling section Greeting & Leave voicemail instruction : You will only see this option if you select Forward to voicemail in your call handling settings and disable the options to Allow callers to reach an operator and Allow caller to check voicemail .
SwitchArcade Round-Up: Reviews Featuring ‘Cruis’n Blast’ and ‘Rift Adventure’, Plus the Latest Releases and Sales
Make sure that you have the latest version of iOS. Check for a carrier-bundle update: Go to Settings > General > About. If an update is available, a message will ask you to update. To check your cellular network connection, try to call someone.
I tried turning off the wifi to set up the voicemail greeting -- no luck. And to take matters from annoying to really problematic, when I dialed *86, I discovered that I haven't been getting any notifications of voice mails left for me, and I had several, a …
When something goes wrong with your dryer, such as when it displays an error number, or when it is not turning on, spinning, beginning, or… Read More »How to Reset Samsung Dryer [SOLVED – Plus Additional Causes and Solutions] How to Factory Reset Samsung A10e [4 Methods To Factory Reset Samsung A10e
how to change your voicemail greeting on an iphone
how do i change my voicemail message on 2 degrees
how to change your voicemail greeting on iphone xr